
Scenario –
You had to migrate an
artifact (say Shared Services security) from Version 11.1.2.1 to Version
11.1.2.3. Basically, the first thing that can strike your mind would be to use
LCM to migrate the security. However, can the task be fulfilled simply via the
use of LCM? Let’s see it.
Here we are migrating “Native Directory” from 11.1.2.1 to
11.1.2.3.
In the source environment (11.1.2.1), let us launch Shared
Services.
In Shared Services,
Application Management
Application Groups
Foundation
Shared Services (Click it - and you will see the artifacts populate to the right)

Basically, you will see
Native Directory
Task Flows
Expand Native Directory and select just "Groups" - we are migrating only Groups for this exercise.

Click "Define Migration"
For Source Options in the next step, leave Default.
The next window is where we can type in the name of our choice for Destination. Let us give a name "Group_Export" and click Next.

Go through all the steps and click "Execute Migration" in the last step.
The Migration Status Report should have status as "Completed" in case the export is successful.
Refresh Shared Services, and expand the "File System" node and we will see "Group_Export" item under the File System.
Now, let's get in to the folder where the Export folder is populated after the process.
The path in my environment is "oracle\Middleware\user_projects\domains\EPMSystem\Server\epmsystem1\import_export\admin@Native Directory"
Here, I have a folder named "Group_Export" which was created during the LCM export process.
The folder "Group_Export" contains two other folders - "Info" and "Resources".
While the folder "Info" has two files - "listing.xml" and "sourceinfo.xml," "Resources" folder has a folder "Native Directory" which contains a file called "Groups.csv"
Now let us see how the LCM process works in the target environment (11.1.2.3 - in this case). Process is almost the same, however, we need to notice the differences in files that are created during the LCM process.
In the target environment (11.1.2.3), let us launch Shared Services.
In Shared Services,
Application Management
Application Groups
Foundation
Shared Services (Click it - and you will see the artifacts populate to the right)
Basically, you will see
Native Directory
Task Flows

Drill down the Native Directory and select just "Groups" - we are migrating only Groups for this exercise.

Click "Export"
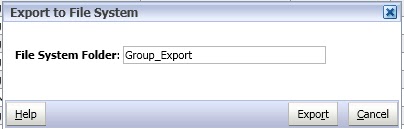
"Export to File System" box appears. Type in an appropriate name and click "Export." In this case, I will type in "Group_Export"
Check the Migration Status Report. The status would be "Completed" if it exports successfully.
Refresh Shared Services, and under "File System" you will notice "Group_Export" like in the following figure.

Now, let's go to the Import_Export folder (the repository for LCM files). In my environment, the path to the Import_Export folder is "oracle\Middleware\user_projects\domains\EPMSystem\Servername\epmsystem1\import_export"
Make sure you know the path.
As I dig in to the folder, I can see a .ZIP file named "Group_Export.zip" - here is where the difference lies.
You extract the .zip file and you will see a folder named "HSS-Shared Services" and two files "Export.xml" and "Import.xml" - This is where the main difference is in terms of the files that are created during LCM export using version 11.1.2.1 and 11.1.2.3.
However, if you dig deeper into the "Resources" folder and further down to the "Native Directory" folder, you have the file that you basically need - in this case, the "Groups.csv" file.
So at this point, all you need to do is
a. Copy the "Groups.csv" file from the source environment and paste it to the target environment in the "Native Directory" folder
b. Go to the "Group_Export" folder so it will have the following files under it
 c. Zip the three files shown above and name it "Group_Export.zip."
 d. Move the "Group_Export.zip" file under the "import_export" folder (the location where the file was created during the LCM export process in the beginning.
Now, you should be able to do a LCM import from the "File System" tree in the target Shared Services.
However, if you dig deeper into the "Resources" folder and further down to the "Native Directory" folder, you have the file that you basically need - in this case, the "Groups.csv" file.
So at this point, all you need to do is
a. Copy the "Groups.csv" file from the source environment and paste it to the target environment in the "Native Directory" folder
b. Go to the "Group_Export" folder so it will have the following files under it


Now, you should be able to do a LCM import from the "File System" tree in the target Shared Services.

